Kicking off the process
Trigger times control how often and how many specific events initiate in a business process simulation. These settings determine the flow of events and are essential for understanding process behavior under various conditions. By adjusting trigger times, you can accurately simulate different scenarios, such as delays or multiple instances of the same event happening in succession, to gain insights into process performance.
In the pizza delivery simulation, trigger times are defined for the customer order which triggers the I want a pizza! start event and the “60 minutes” timer intermediate catch event.
Setting trigger times for start events enables us to model customer order patterns, such as the frequency and timing of incoming orders. Adjusting these trigger times allows you to simulate realistic customer behavior, such as peak weekend times, or slower weekdays, and observe how the process adapts. Meanwhile, for the timer intermediate catch event, the inter trigger timer value helps simulate when a customer calls to ask about their order if it hasn’t arrived within a reasonable timeframe.
For start events, trigger times are set using two parameters: trigger count and inter trigger timer. The timer intermediate catch event only requires you to set the inter trigger timer.
Trigger count defines the maximum number of instances the process will trigger. If no value is provided, the process will continue triggering instances until the end of the simulation.
Inter trigger timer defines the time interval between occurrences of the event. The event will trigger repeatedly at regular intervals until the trigger count is reached.
You can set either a default value for the trigger times or associate them with a calendar to reflect variations in events based on specific days, times, or conditions.
I want a pizza! start event
Let’s consider the start event where a customer calls to place an order. To model the real-world timing of when these orders come in, we’ll need to adjust the inter trigger times based on the day of the week. On weekdays, customers tend to place orders at a slower rate, while on weekends, the order frequency increases.
To reflect this variation in customer behavior, we’ll use different inter trigger timers for weekdays and weekends using the calendars you created previously to capture these patterns. By associating the inter trigger timers with a specific weekday and weekend calendar, you can more accurately simulate how orders come in based on real-world customer behavior, adjusting for different demand levels across the week.
Trigger count
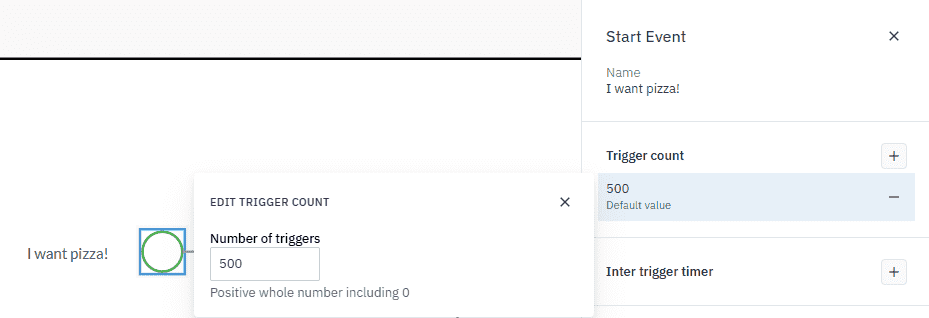
For this simulation, the pizza maker prepares 500 pizza dough portions, which reflects the maximum number of pizzas they can make. This value is used as the trigger count, meaning the simulation will trigger up to 500 customer orders, reflecting the capacity of the pizza maker to fulfill orders.
We’ll set this trigger count using a default value, a predefined setting that applies automatically unless specifically adjusted. It provides a quick way to configure a parameter with a standard value for the simulation.
-
In the Customer pool, select the I want a pizza! start event.
-
In the toolbar, click
to open the Parameters panel. -
Click
next to Trigger count and select Add default value. -
To set the parameter value, click the current setting.
-
In the dialog box that opens, set the Number of triggers to 500.
Inter trigger timer
To account for the difference between weekdays and weekends, we’ll associate the inter-trigger timer parameter on the I want a pizza! start event. This will simulate a slower order rate on weekdays and a higher frequency of orders on weekends.
-
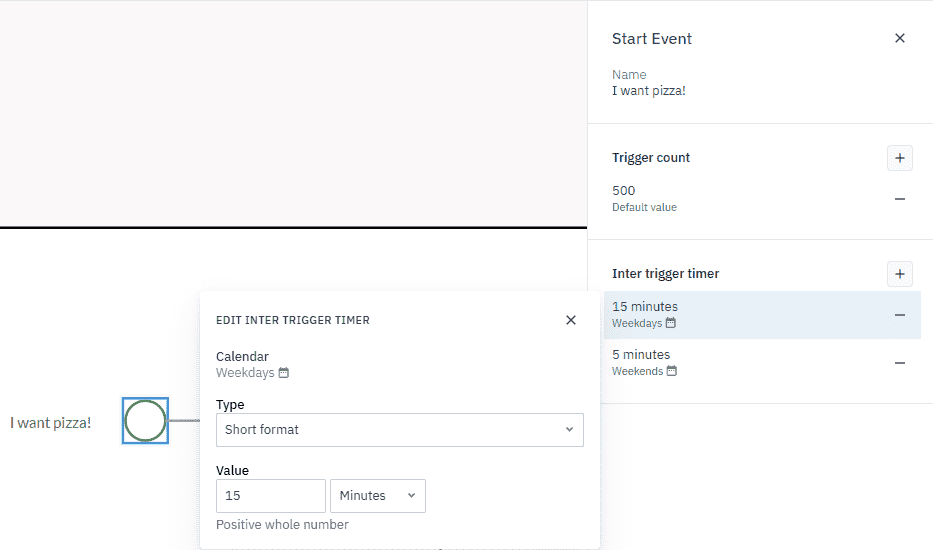
On weekdays, you’ll set the inter trigger timer to 15 minutes to simulate a slower order rate.
-
On weekends, you’ll set the inter trigger timer to 5 minutes to reflect the higher frequency of orders.
-
In the Customer pool, select the I want a pizza timer intermediate catch event.
-
Click
next to Inter trigger timer and select Add value to Weekdays. This associates this trigger count value with the Weekdays calendar.
-
To set the parameter value, click the current setting.
-
In the dialog box that opens, set the Value to 15 minutes.
-
Click
to close. -
Repeat this steps 1-5 and add a value for weekends.
60 minutes timer intermediate catch event
This simulation also includes an intermediate timer catch event to manage customer inquiries about their order if a pizza isn’t delivered within a reasonable amount of time.
To simulate this behavior, the timer intermediate catch event is set with an inter trigger timer of 60 minutes, reflecting the maximum wait time before a customer is likely to inquire about their delivery. This ensures the simulation accounts for delayed orders and how they impact the overall process.
-
In the Customer pool, select the 60 minutes timer intermediate catch event.
-
Click
next to Inter trigger timer and select Add default value. -
To set the parameter value, click the current setting.
-
In the dialog box that opens, set the Value to 60 minutes.
-
Click
to close.